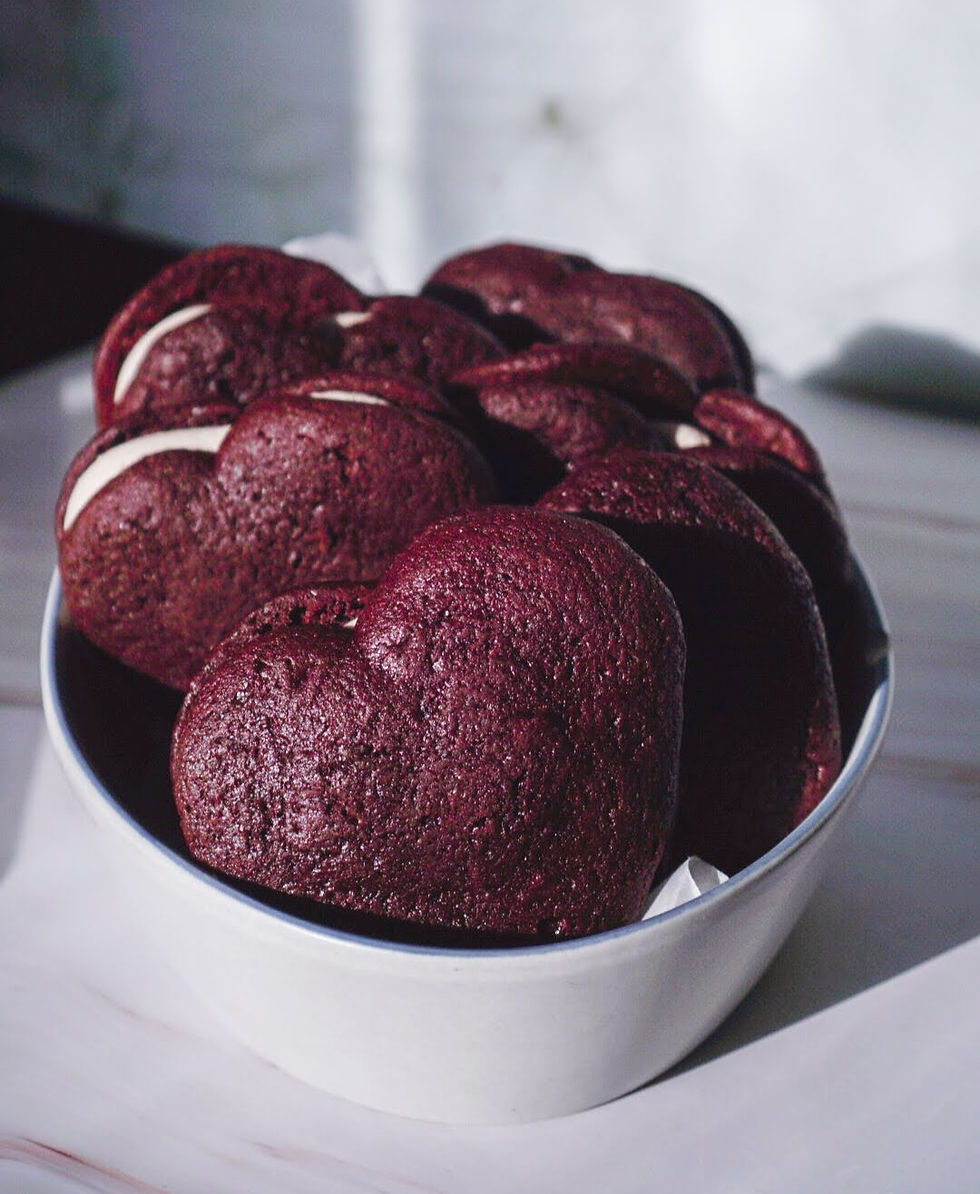
Valentines Red Velvet Whoopie Pies

Updated: Jan 8, 2022
Active time: 45 minutes | Bake time: 10 minutes | Yield: 10 whoopie pies
If you've never had a whoopie pie before, honestly you're missing out. It's essentially a cake sandwich so you really can't go wrong with that. Everyone has their own opinion as to what type of cream should be in the middle of a whoopie pie (many people prefer whipped cream), but I prefer something a little thicker that doesn't just ooze right out the sides and this marshmallow filling totally fits the bill.
If you're planning on making these into heart shapes, make sure you REALLY make a dramatic 'V' shape in the heart. Since the cakes do spread in the oven, you'll end up with blobs instead of hearts if you don't do a dramatic heart-shape.
Also, you can totally make these in the traditional circle shapes if you want to simplify it a bit!
Ingredients:
For the Cake:
360g (3 cups) all purpose flour
45g (6 tbsp) cocoa powder
¾ tsp salt
1 ½ tsp baking soda
113g (8 tbsp / ½ cup / 1 stick) butter, softened
200g (1 cup) granulated sugar
67g (⅓ cup) brown sugar
2 large eggs
2 tsp vanilla bean paste (or vanilla extract)
About 2 tsp red gel food coloring, optional (it will look like chocolate if you do not use the food coloring, but it’s not necessary if you want to skip it)
1 cup buttermilk
For the filling:
6 tbsp butter, melted
139g (1 cup + 2 tbsp) powdered sugar
200g (1 cup + 2 tbsp) marshmallow fluff
1 ½ tsp vanilla extract
¼ tsp salt
Directions:
For the cakes: Preheat the oven to 350°F. Prepare 2-3 sheets of parchment paper for your baking sheets. On the bottom side of the parchment paper, use a pencil to draw hearts. I recommend using some sort of stencil so they are all even, and make sure they are spaced out well, as the cakes will spread slightly in the oven. Set aside.
In a small bowl, whisk together flour, cocoa powder, salt, and baking soda. Set saide.
In a large bowl, with a spatula (or electric mixer with paddle attachment), cream butter with both sugars until light and smooth. Add eggs and vanilla, cream until well combined.
Add in red food coloring and beat, ensuring the color is evenly distributed.
If the color is not as bright as you would like, feel free to add more food coloring, keeping in mind that too much food coloring can add an artificial flavor to your cakes. Also keep in mind that once you add the cocoa powder, the color will become darker.
Alternate adding the dry ingredients and the buttermilk, starting and ending with the buttermilk. Fill a piping bag about ¾ full with cake batter and pipe the cake into your heart shapes on the parchment paper; make sure to make a very distinctive heart shape, since the cakes will spread in the oven.
Bake for 10 minutes, until the cake springs back when touched with your finger.
Cool on the baking sheet for about 5 minutes before transferring to a cooling rack. While the cakes are cooling, prepare your filling.
For the filling: Add all filling ingredients to a medium bowl and mix vigorously with a spatula (or electric mixer with paddle attachment) until smooth.
Assembly: Divide the cakes in half; you will be icing half of the cakes and using the other half to sandwich with them. Use a piping bag or butter knife to spread about 1 tbsp of filling onto one cake, then top with another cake to create a sandwich.
Notes:
You can store these in the refrigerator in an airtight container for up to one week.
You do not need an electric mixer for this recipe. If you plan to mix by hand, ensure your butter is well at room temperature, as it will be difficult to mix the butter if not softened.


Comments